Siemens Gigaset 685IP Mini Review
Overview
The two cordless phones that we have were fine till we moved into a house. The two phones suddenly became too far from room to room. It was time again to look for a phone which was scalable and with Asterisk / FreePBX setup and working, it was time to look for a new home phone to accompany the existing ones and work with Asterisk.
Hardware
After purchasing the Motorola MotoLivn D812 two handset I was not very happy with the ergonomics nor the initiative of the device although it did help me setup FreePBX with SPA 3102.

A damning limitation with the current setup is if one handset is active e.g listening to voicemail the other handset cannot make another call e.g to it’s own voicemail or to and outside line.
I then looked for a phone that was capable of traditional landlines and VOIP which the Siemens Gigaset does.
The box label stated the 1 handset package that I bought was made around 2007 where as the two other handsets I brought were made in 2009. Between the three there was no noticeable physical difference between the newer and older handset. They all function the same and only the software configuration was different.
Battery

The battery life on the handsets were impressive! The instructions say to cycle the power at least once before use so I changed all three up and started an intercom call between two of them. Four hours later and only one out of approximately four bars went. I left it to discharge over night.
Functions
The phone has a mail feature which (annoyingly) flashes red on the key for voicemail / missed calls. I have set the device up so that when you select the voicemail message it dials the voicemail number. One of the best thing about this phone is that it syncs across all handsets so if the red blink for a missed call / voicemail appears, it will show for all handsets. If you view the missed call or listen to the voicemail so that there are no unread entries, all the other handsets would eventually sync and pick up that it has been read and the LED won’t flash on all of them. A small but nice feature compared to the Motorola handset which you had to go to each handset and acknowledge the missed calls one by one.
Over time the red flash has become really annoying because it constantly flashes even if you acknowledge there’s an unread voicemail. There is an option to turn the red light off but then there is no clear indicator that there was a missed call or a voicemail.

Due to the hybrid setup of my house if the call was picked up on the old Motorola handsets, the Siemens thinks the call was missed and vice versa. This is a given problem because there is no way to notify one or the other if the handset stopped ringing because it was picked up or the caller hung up. Hopefully moving to a single system it will resolve this.
The display can be set to keep the back light lit up. This is nice if your using the clock as a screensaver. The screensaver can be set to a picture, clock or live information such as weather, stock ticker, etc. A feature you don’t see on all phones. The phone has very small amount of memory to allows users to put their own pictures to be used as screensaver as well as phonebook etc using the provided software. I have not tested this as I would use Asterisk / FreePBX to manage all the caller ID information.
Configuration
I had trouble with accessing the online webpage which was like a router where you can change the settings of the phone/base station. I tried everything networking related to get it to work but gave up trying to access it on the computer. It was only when I used a handset and went to check for updates which it found and downloaded did it fix the problem.
685IP Integration With FreePBX
At first the settings page had some different labels to what I was use to. For example the Domain address I left blank at first because I wasn’t running it in a domain but only to find it was to the PBX host server.
Besides that fact it was very simple to set up with FreePBX.
FreePBX Settings
Create one extension for each handset that you have connected to the Gigaset. This allows each handset to be recognised as an individual handset and are the steps described below. An alternative is to create one extension for all the handsets however if one handset is in use the others may be unavailable which is not desirable.
- Navigate to the FreePBX Administrator’s web page. Log in as if required
- Click on Extensions under the basic category on the left hand side menu.
- Click on the Add Extensions from the right hand side menu.
- Select Generic SIP Device from the Device dropdown menu.
- Click Submit button.
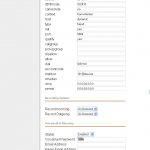
- Ensure the settings are similar to the settings below:
- Change the following fields to suite your system / preference:
- User Extension – The internal number to be assigned to the handset.
- Display Name – The name which will appear on the handset from an internal call e.g Handset 1 calls Handset 2 where Handset 2 will see the display name.
- secret – The password for the handset when registering with Asterisk/FreePBX.
- Voicemail – Enable or disable and setting any other details related to voiccemail.
- Click Submit button to save the extension.
- Repeat above steps till all handset extensions have been created.
- Apply the changes to make it take effect.
Unfortunately the S685IP does not handle outgoing calls like the Sipura 3102 does. This means making calls must be configured in the Gigaset page.
Siemens Gigaset Base Station Settings
With FreePBX setup and ready for the new handsets, configure the handsets to use the newly created extensions.
- Navigate to the Simens Gigaset webpage.
- Login to gain access to the configuration pages.
- Go to the Settings tab/
- Click on Telephony > Connections from the tree menu on the left where it will list up to 6 phones.
- Edit each phone in turn that will be / is connected to the base station.
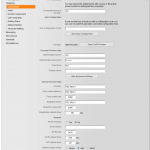
- Click on Show Advanced Settings to see all the settings and for each phone changing the following information:
- Connection Name or Number – Display name that appears on the handset when it’s on standby
- Authentication Name – Set it the User Extension from the FreePBX setup.
- Authentication password –
- Username – Set it the User Extension from the FreePBX setup.
- Domain – IP Address of FreePBX server
- Proxy server address – IP Address of FreePBX server
- Registrar server port – IP Address of FreePBX server
- Outbound proxy – IP Address of FreePBX server
- Save the changes
- It is also advised to disable the voicemail service on the Siemens Gigaset if your using FreePBX and set the voicemail dialling number:
- Go to the Gigaset web page, login and go to the Settings tab.
- Select Telephony > Network Mailbox
- For each handset enter the voicemail number (default is *97)
- Save the settings.
Limitation
The phone is really good but like everything there are limitations.
The one big lack of functionality is the incoming PSTN fixed line and ability to pass it to a PBX. If the unit was used as a standalone without a PBX then it would more than what a “normal” consumer would need.
Summary
This is an exceptional phone package which may be over kill for low to mid consumers but definitely worth considering for mid-high to high end consumers to even small businesses.


