Bypass Blocked Websites Using SSH Proxy
Overview
SSH tunnels are very useful for all sorts of things. One of these uses include proxy. If you have SSH access you can set one up very quickly.
I do not condone any misuses of any I.T equipment, software or any other kind described in this article. All practices should be used within the law and policy set by your region. Any examples are given are done so to highlight the uses this article may provide.
Uses
By using your own SSH proxy you can by pass firewalls or blocked websites by directing the data through this connection and out from your SSH server.
For example at a work place they block websites such as Facebook, Twitter, etc. As long as you can connect to your SSH server the web traffic can be re-routed through this connection without the company seeing what is happening when the data is being re-routed apart from you have a SSH session (which may raise some eye brows if you do not have a legitimate use in your daily activities).
Pre-requisites
A server running an SSH server. The remainder of this article will be done on a Ubuntu box.
Install SSH server by entering the following command in the terminal:
$ sudo apt-get install openssh-server
The default configuration should suffice and you can use your local accounts to log in.
Establishing Multiple Ports
It is generally a good idea to have your SSH server listening to more than just the default port (which is 22). Most places may ban this port to stop SSH session going out of an organization potentially leaving a connection open for unwanted outsiders.
To work around this look at my earlier article on how to set up multiple ports on the SSH server.
Using Proxy On Windows
Download Putty from Putty’s website. It’s just a small program that lets you connect to a SSH server amongst other protocols.
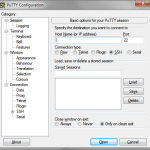
Starting the program up will show a window with a tree like navigation to the left and settings pane to the right and a bunch of buttons at the bottom. The following sections are based on the nodes on the left hand side of the window.
Session
Enter the IP address of the server and the ports configured above. Ensure the Connection type is set to SSH.
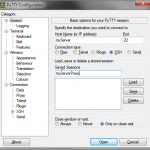
In Saved Sessions enter a name to call your connection so you do not have to enter the above and the following details every time. Do not press the Save button till all the settings have been set.
Connection > SSH > Tunnels
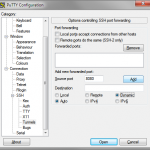
Enter the port your web browser will be using in the Source port box.
Leave Destination blank and select Dynamic and Auto radio buttons. Click the Add button to add the connection tunnel to the list. Multiple tunnels can be entered as long as different ports are used.
At this point you can go back to the Session page and save the session by clicking on the Save button. To load the connection next time, select it from the list and click on the Load button.
Click on the Open button to initiate the connection.
A warning my come up if it’s your first time connecting to your server via SSH. Accept it and it will prompt for a username then password. Enter your details pressing enter at each stage to move onto the next.
Once you get in it’s time to configure the web browser.
FireFox
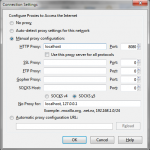
Go to Tools > Options… Select the Advanced button and go to the Network tab. Click on the Settings button in the connection area. A new window should pop up.
Select Manual proxy configuration and set the HTTP Proxy to localhost and the source port set in the Putty section. Ok to all the dialogues and your done.
Internet Explorer
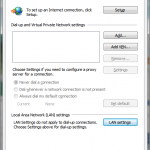
Go to Tools > Internet Options. In Internet Options window go to the Connections tab.
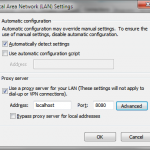
Click on the LAN settings button to reveal another window.
In the Proxy server settings tick the box for Use a proxy server for your LAN… and enter the address as localhost and the port as the source port in Putty. Save and close all dialogue boxes and windows.
Summary
A neat trick to stop people snooping at your browsing habits or just to avoid blocked sites. Sites may load slower because it has to go from your local machine, to the proxy server and out to the Internet and back again.


